Main mechanic, blockout and workflow stuff
The phasing light
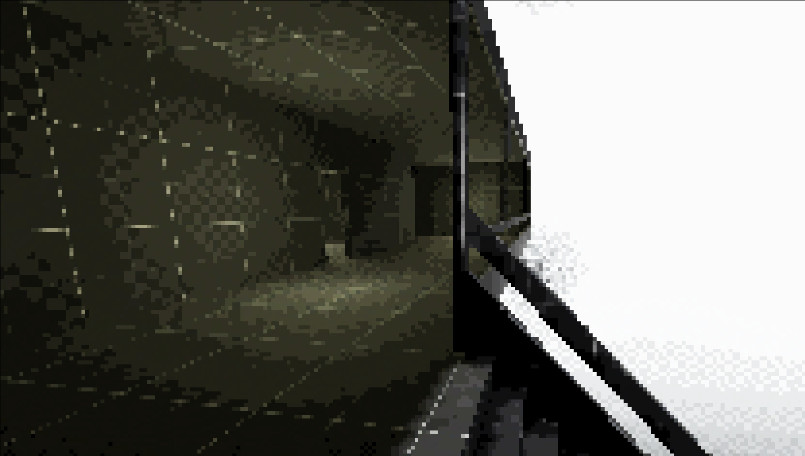
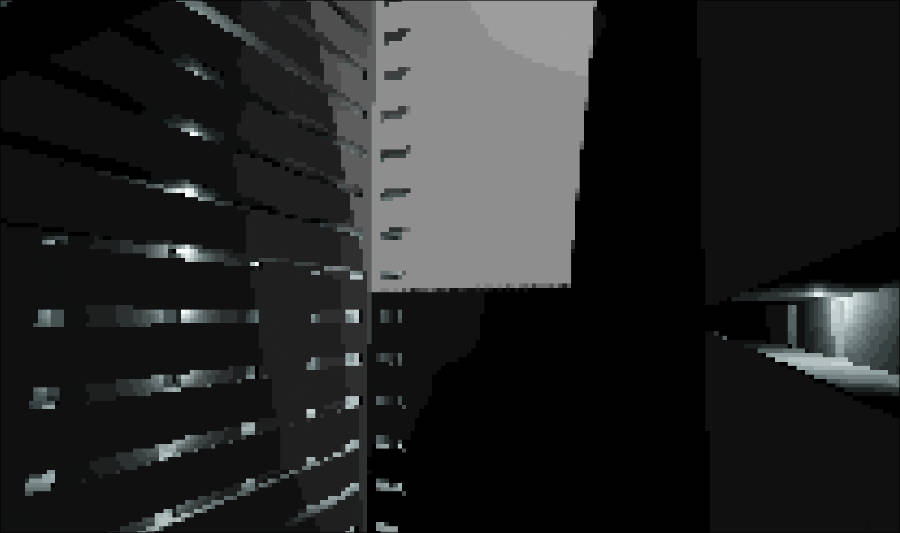
As you may have seen last week, I uploaded a GIF where a light is phasing. I think I may have forgotten to mention how important that actually is. This is basically the main function in the game. Everything should take this into account.
The player should not read this through a HUD, but rather feel it. That is why I wired it into the shader effect I made last week.
You remember? The one where the screen gets pixelated and kinda JPG-ified. Yeah, that one.
Based on the sine wave, pixelation and levels are controlled according to their base value.
newPix = initPix + (float)Manager.Instance.newSine * _pixModifier;
So basically:
If the sine is near -1 and _pixModifier is also something negative, the pixelation effect gets stronger.
If the sine is near +1, the pixelation effect gets weaker.
Same idea for levels.
And by the way: the animation from the GIF is of course sped up. The effect will not be that fast ingame. I want this to be subtle.
Of course, this will not be the only thing telling the player subliminally how to feel... or how the player character feels. But it is something I believe can help translate between ingame character and player if done right. Let's see...
Preproduction in Godot
Right now I feel like I have at least a basic understanding of Godot, so I finally started the blockout / preproduction phase.
Thanks to CSG, or constructive solid geometry, it is relatively simple to create levels, and even in a non-destructive way. Mainly for prototyping of course,
Here comes the usual Unity comparison: I think Godot wins this one again.
Unity has a tool called ProBuilder, which is great. I genuinely liked it a lot. I even thought about building my production level with it back then. But when I used it, doing something as basic as cutting a door hole was just not very straightforward. Maybe there is a boolean tool now, but back then I either didn't have it or didn't find it, so I ended up doing it the long way.
Example: you want to make a 3x3x3m cube with a 2x1m door. In ProBuilder, or at least the way I did it: you basically have to build the layout so the doorway already exists in the topology. Start with the floor, extrude until the door area, stop, extrude around the door opening, stop again, finish the floor. Then extrude edges up for walls, make sure you have the seam where the door is, then delete faces. And then you notice you also nuked faces inside the doorway, or created weird inside faces, and now you have to fix that too.
You get the idea. It works, but it is just kinda tedious for something so simple.
In Godot, you create one 3x3x3m cube, flip normals so you can work with it like a room, then create another one that is like 2x1x0.1m, position the second one where the door is supposed to be, select subtraction... done.
Things that took some getting used to
There were basically two or three things that took a bit of time to understand.
The images below are basically the same setup, just reordered. And that already changes the result. So a cutter does not just subtract from everything.
It only affects whatever is part of the result up to that point in the chain.

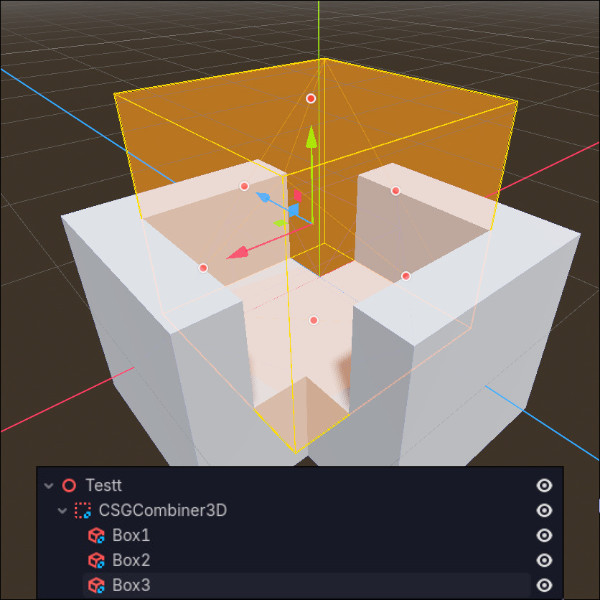
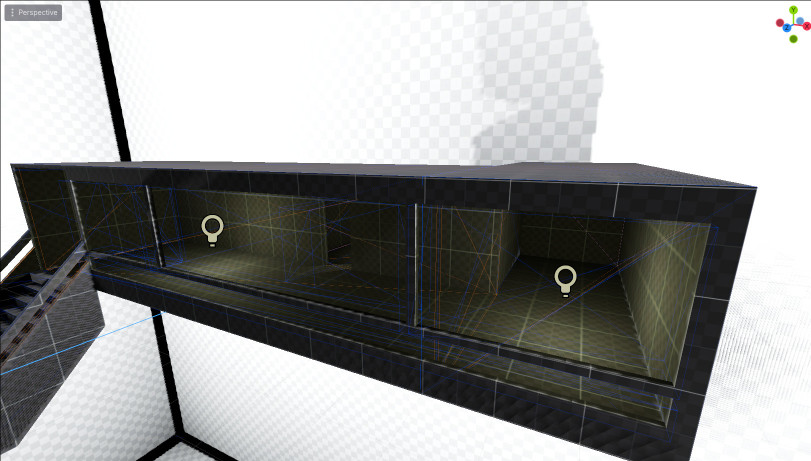
Secondly, if you want “real” rooms, you usually want wall thickness. So you do not just make one inverted box and call it a day.
The clean way is: make the outer box (your building shape) and then subtract a slightly smaller box inside it. That gives you actual walls.
This matters if your room is supposed to be visible from both the inside and the outside. Otherwise you end up in situations where you cannot look outside from the inside, but you can look inside from the outside. Or the other way around, depending on how you flipped normals. Either way, it looks wrong.
POST RELEASE ADDENDUM:
I realized something right after writing this. It is actually even easier than I thought.
What I described above is the way I first approached CSG.
Basically building rooms as hollow shapes. So, make a box, flip normals or subtract a slightly smaller box from it, and now you have a room shell with wall thickness. That works, and for quick room prototyping it is still totally fine.
But for larger architectural blockouts, that is not the easiest way to think about it.
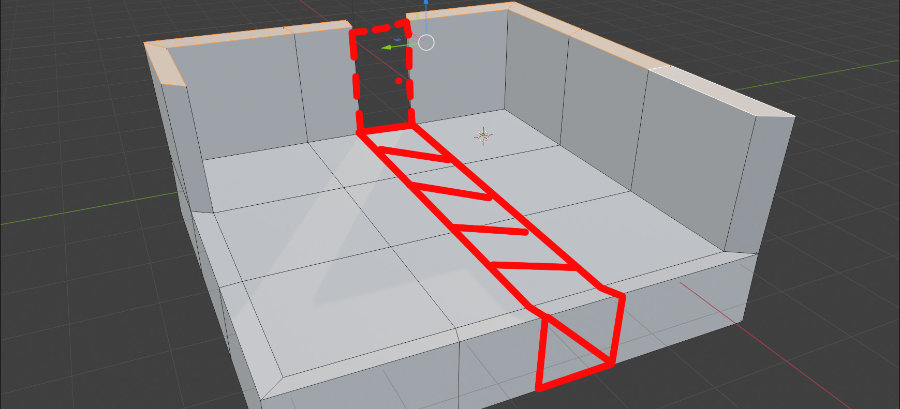
What works much better is to start with a solid mass first, and then subtract the walkable space out of it. So instead of building a hallway, a staircase, and separate room shells piece by piece, you begin with one big block that represents the building volume, and then carve the hallway, rooms, etc out of that.
That sounds almost too obvious in hindsight, but it immediately made blockouts feel way more natural. Instead of placing objects in empty space and hoping they somehow read like architecture, you are defining the empty space inside a larger structure.
Local development with DDEV instead of suffering
I also set up DDEV for local development, because I am simply not in the mood to set up Docker Compose properly just to mirror my webserver environment.
A few things had to move around / change for Docker Compose to work the way I wanted, but now everything is nicely packed and just works. HTTPS is preconfigured, routing is nice, and there is no hassle.
Also: in the event that I do end up sending mail from there (which I most likely won't) I can catch it. So that is nice too XD
Workflow overhaul
I also finalized the workflow overhaul.
By moving to DDEV, the goal was to develop locally while also making deployment easier. That led to some overhauls and refactorings that had to happen. But in the end, they actually improved the previously flawed system.
I also noticed even more architectural issues. However, those could also be interpreted as creative liberty :D
Anyways, I can now create an extension, add it to the root composer.json, develop it, test it, etc. If it is done, I push everything with a tag, go to the server, add the require there as well, run update, done.
Much better than rawdogging everything :x
And it is even versioned.
Also, thanks to the refactorings, you can now just pull the template wherever you want, create an .env.php in the config directory based on the provided example, run composer install (or ddev composer install if you are working with DDEV) and... it should just work.
At least I hope so. Let me know if it doesn’t :x
Migration system and stronger foundations
I even implemented a migration system that runs after each Composer update.
It checks every extension (including the core, of course, which runs first) and searches for files in:
{ext}/backend/private/Repository/Migrations/*.sql
Then it checks whether a migration has already been executed by looking at extension name + SQL file name. If it already exists, it gets skipped. Otherwise, it runs.
So yeah, not much user-facing change has happened. But the foundation is stronger than before, and I do not have to worry as much anymore about leaking everything when dumping something.